A
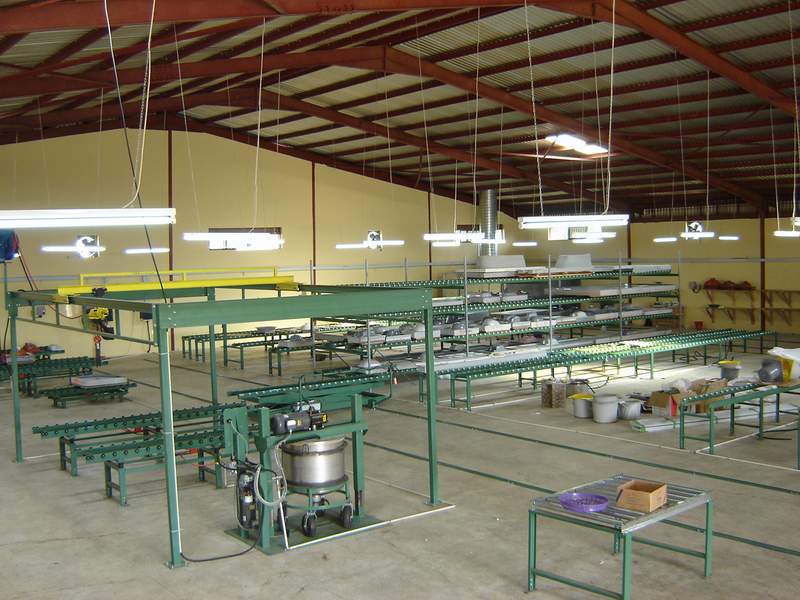
well planned factory layout and a good proportional balance of
equipment and molds is crucial to establishing a successful cultured
marble factory. A complete system will include matrix blenders,
vibrating tables, transfer carts, multi-level storage racks, conveyor
lines, scissors lift, floor rails, gel coat spray booth, dust collector
and working tables.
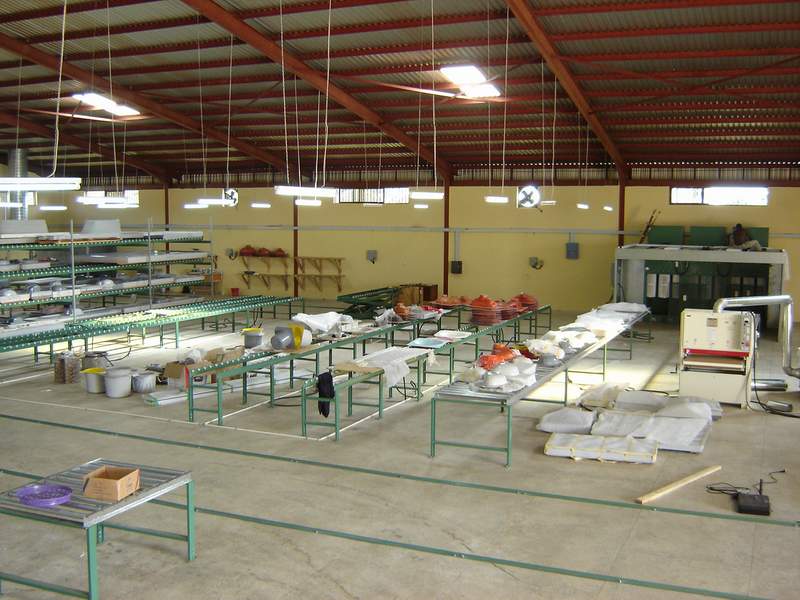
Smart manufacturing includes
a well planned factory layout and a good proportional balance of
equipment with your molds, which is crucial in establishing a
successful factory. A complete system will include matrix
blenders, vibrating tables, transfer carts, multi-level storage racks,
conveyor lines, scissors lift, floor rails, gel coat spray booth, dust
collector and working tables. We promise to never oversell you or
sell you more than you need. We will work with you and explain
the details that will keep you within your budget and yet give you
everything you need to manufacture. For example, a Tilt/rotate
Gel Coat Spray Cart is convenient and nice to have but many factories
are producing marble with a fixed level cart which costs less than half
the price.
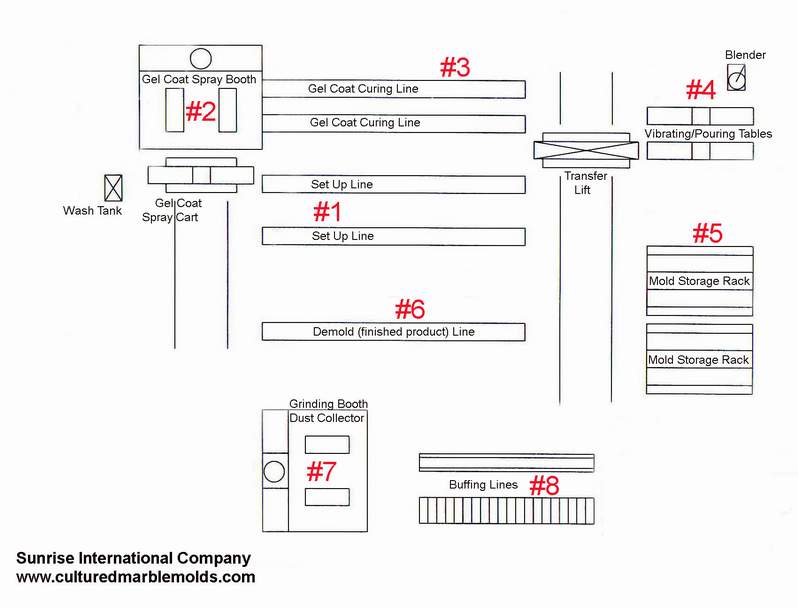
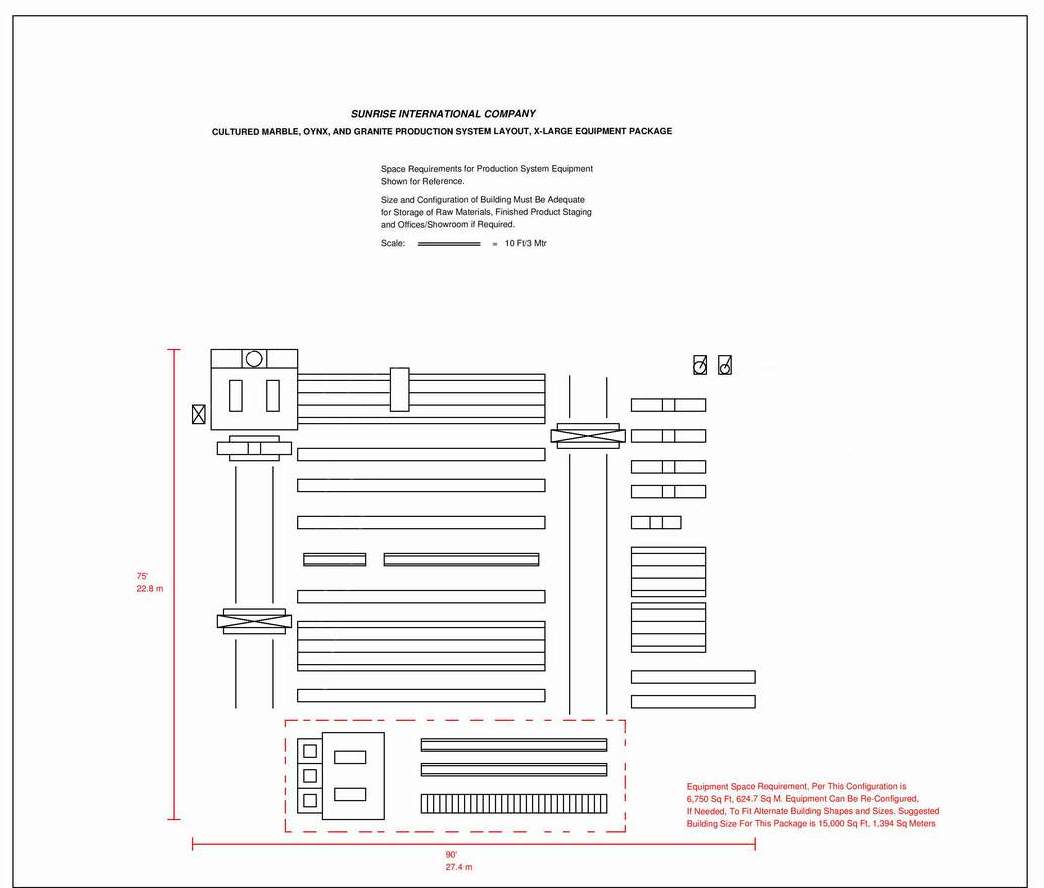
The
layout below shows the sequence a mold goes through during the
manufacturing process and under that are brief descriptions of each
piece of equipment. The manufacturing steps are numbered 1
through 8 in the drawing and the description of each piece of equipment
is numbered the same. Every building structure and every new
manufacturer’s requirements are different but you can use
this as a general guide keeping in mind that we will lay out your
factory to fit your needs, requirements and balance your needs with
your budget.
|